Have you ever admired a gorgeous professional flower arrangement and thought, “I could never make that”? Think again!
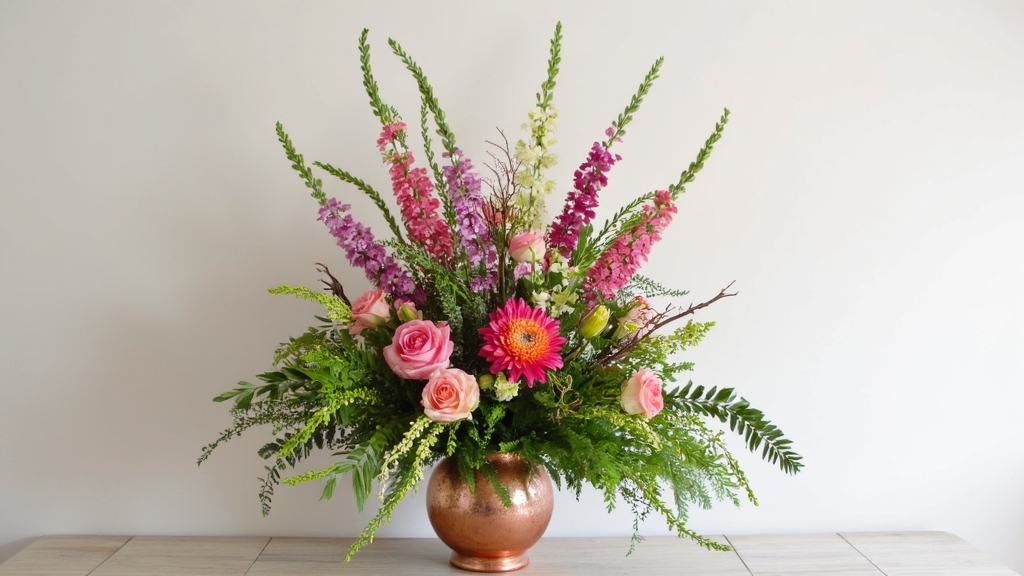
Today I’m sharing a classic front-facing arrangement technique that’s perfect for beginners while still looking impressively professional.
The best part? Skipping environmentally harmful floral foam and using a more sustainable approach that helps your flowers last longer!
Why Try This Design?
This arrangement style is incredibly versatile – perfect for mantels, console tables, or as a stunning centerpiece for special occasions.
It creates that beautiful, full look you see in high-end arrangements, but uses fewer flowers than you might think!
Plus, the techniques you’ll learn form the foundation for countless other designs.
Materials You’ll Need
- Container: A shallow casserole dish or similar vessel that holds water
- Chicken wire/mesh: To replace floral foam (more eco-friendly!)
- Waterproof tape: To secure the mesh (floral tape or even strong, clear tape works)
- Garden snips/scissors: For cutting stems
- Flowers:
- Main flowers: 5-7 roses or similar focal flowers in 2 complementary colors
- Secondary flowers: 3-5 calla lilies, carnations, or similar medium-sized blooms
- Filler flowers (optional): Small blooms for texture
- Foliage: Ivy, laurel, ruscus, or whatever greenery you have available
DIY Substitutions: No casserole dish? Any shallow water-tight container works! No chicken wire? A clean, sanitized plastic berry container (like a strawberry container) can work in a pinch. Use what you have!
Step-by-Step Instructions
- Prepare your container: Fill your casserole dish or chosen container with 1-2 inches of fresh, room temperature water.
- Create your mechanics: Form the chicken wire into a loose dome shape that fits inside your container. Secure it with waterproof tape around the edges to hold it in place.
- Prepare your flowers: Remove lower leaves from all stems that would sit below the water line (these can rot and create bacteria). Cut stems at a 45-degree angle for maximum water absorption.
- Create the foundation: Place your main flowers (roses) first, inserting stems through the mesh grid and into the water. Start by placing them in a loose line, varying their heights-some higher, some lower-to create dimension.
- Add staggered height: Position taller flowers toward the back center, with gradually shorter blooms as you move outward, creating a gentle arc shape.
- Introduce secondary flowers: Add calla lilies, carnations, or other secondary blooms between your main flowers, again varying heights and angling them slightly outward for a natural spread.
- Add foliage last: Fill any remaining gaps with foliage, using longer pieces to create a frame and movement around the edges. Let some trail gracefully to soften the arrangement.
- Make adjustments: Step back frequently to review your work and make adjustments as needed. Remember, you can always move things until you’re happy!
Pro Tips & Common Mistakes to Avoid
- Water level matters: Check water levels daily-these shallow containers can dry out quickly!
- Flower placement before foliage: Always place your main flowers first to create structure, then add foliage. This prevents wasting flowers hidden behind too much greenery.
- Feel the placement: Let your hands guide you-if a spot feels empty, it probably needs something. Trust your instincts!
- Don’t overstuff: Leave some breathing room between blooms for a more natural, professional look.
- Stem length is crucial: Always ensure stems reach the water, not just the mesh. Proper hydration keeps your arrangement fresh longer.
- Balance heavy with light: If using visually “heavy” flowers like full roses, balance with lighter, airier foliage like Italian ruscus for contrast.
Creative Variations
- Seasonal Switch: Use spring bulbs and forsythia for spring, sunflowers and dahlias for summer, or evergreen branches and berries for winter.
- Color Stories: Create monochromatic arrangements using different flowers in the same color family for an elegant, cohesive look.
- Occasion-Specific: For weddings, use whites and pastels; for birthdays, bright celebratory colors; for sympathy, soft whites and greens.
- Container Creativity: Try a vintage teacup (for mini arrangements), a rustic wooden box lined with plastic, or even a hollowed-out pumpkin for fall!
You’ve Got This
Remember, flower arranging is an art, not a science. There’s no “wrong” way to create beauty! The most important thing is to enjoy the process and experiment freely.
Your first arrangement might not look the same, but it will be uniquely yours-and with each new arrangement, you’ll develop your eye and confidence.
Don’t worry about perfection. Even professional florists adjust as they go!
Start with these basic techniques, then let your creativity bloom!
Want More Tutorials Like This?
If so, sign up and I’ll let you know whenever I add or update anything here.
You can also follow me on social media for updates. And if you enjoyed what you just read, share it with your friends.
Your support has been awesome! Let’s continue to explore the vibrant world of flowers and plants together!
Til next time,


