Choices To Preserve Your Wedding Bouquet: Professionally Done Or DIY Bouquet Preservation?
According to a recent study by The Knot, couples spent an estimated $2,300 on their wedding flower arrangements last year.
So it’s no surprise that brides ask me if there is a way they can preserve their wedding bouquet as a permanent reminder of their special day.
My answer is yes, but how you preserve your wedding flowers depends on how you want to display them.
Wedding Bouquet Preservation: Your Options
You have several options available for preserving your wedding bouquet. Have it done professionally, or do it yourself. Each option has pros and cons, so let’s take a closer look at each.
Hiring A Floral Preservation Service

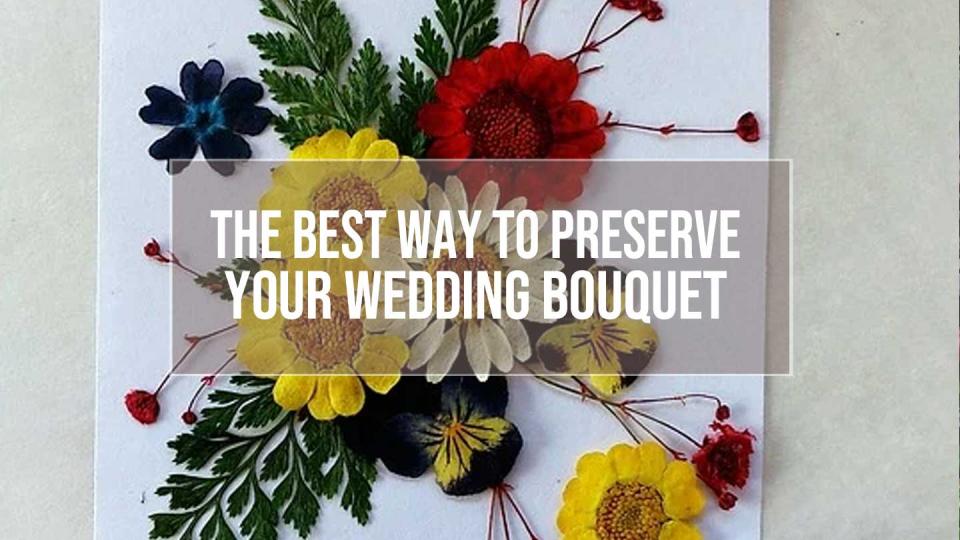
Preserving and displaying your bouquet, as shown in the above photo, is not a DIY project because the most realistic results are obtained by freeze-drying the flowers from your wedding bouquets or floral arrangements. This preservation process requires commercial freeze-drying equipment to do it right.
If you want your bouquet to last a lifetime, I strongly advise hiring someone who specializes in commercial floral preservation to do the entire job.
Proper wedding bouquet preservation takes a little time and will cost you some money, but the results will be worth it.
Book a company to work with before your wedding day if you decide to go this route. It’s best to find one nearby (if you can) for them to receive your bouquet promptly. One to four days after the wedding is best to ensure you achieve optimum results.
The Pros and Cons of Using a Floral Preservation Service
Pros:
- Floral preservation professionals will know and use the best agents for preserving the particular type of flowers in your bouquet.
- Freeze-drying your wedding flowers will maintain the most realistic look. It would be best if you had this done by professionals with the right equipment.
- They can handle your project from start to finish and offer you various keepsake options, including frames or a shadow box, domes or a glass encasement, and all types of flower petal jewelry.
Cons:
- Be prepared to spend several hundred dollars for your wedding bouquet preservation.
- You will have to ship your wedding flowers as soon as possible for the best results.
- Some fresh flowers cannot be freeze-dried, or additional costs and time may apply if they can.
If you want to preserve your wedding flowers by doing it yourself, here are the best ways.
DIY Wedding Bouquet Preservation: 2 Methods You Can Use
Using silica gel or pressing are the two most popular flower preservation methods. They are the easiest and least expensive DIY ways to get the job done.
Before you work with the actual flowers from your wedding bouquet, I suggest testing both methods.
Both methods will give you good results. Determining which one to use depends upon how you want to display your keepsake blooms.
How To Preserve a Wedding Bouquet With Silica Gel
Silica gel is the best method to choose if you want to keep the flowers from your bouquet primarily intact.
And yes, there will be some initial expenses for supplies, but they will be minimal. Because silica gel is reusable, the more flowers you dry, the more the cost diminishes over time.
Here are the basic steps you’ll need to take with the silica gel method.
- Remove the base of the stems to about one inch below the flower.
- Fill an airtight container you will use to dry the flowers one-quarter of the way with the silica gel.
- Place the flower heads on top of the layer of silica gel with the blooms facing up.
- Pour silica gel/sand over the blooms until the petals are covered.
- Cover the container and place it in a cool and dry area for four to seven days.
- Check the blooms for drying. If they are not quite dry, sift more silica gel on the petals, and let them sit another day or two.
Here’s a short video clip to teach you the basics of preserving flowers using silica gel.
If you want to speed up the drying process:
- Place your container in the microwave for one minute.
- Add more silica gel on top of the blooms (about another inch) to help prevent the flower petals from bubbling.
- Allow the silica gel to cool for at least 30 minutes before removing the flowers.
To reassemble the bouquet, you’ll have to recreate the flower stems using floral wire and tape, as shown in the video.
How to Preserve Wedding Flowers: Pressing Methods

If you’re looking for an easier way to preserve and display your wedding flowers, pressing them would be a great choice. Get started by gathering your materials. There are a couple of ways of pressing flowers. For both, you’ll need the following:
- Paper to absorb moisture like non-bleached blotting paper or parchment paper, some scrap cardboard, glue, and tweezers. You will also need a couple of heavy books or a flower press.
How to Use A Flower Press
- Separate the leaves and flowers.
- Starting with a piece of cardboard, lay a sheet of blotting paper on top of it.
- Place your flowers on the blotting paper. Add another piece of blotting paper on top of the flowers and another piece of cardboard to create your first layer.
Note: For best results, avoid using any paper with texture or embossing (like paper towels) that may leave an imprint on the flowers.
You can substitute parchment paper or coffee filters for blotting paper. - Repeat for as many layers as needed.
- Place the entire packet into your flower press.
How To Use Books To Press Flowers
- Place your layers on a flat surface. Then place a heavy book or two on top of your flower package.
- Or, if you are only pressing a few flowers, you can place them between the pages of a book that’s lined with blotting or parchment paper.
Leave them there for two to four weeks with either pressing method, depending on the flower type. Some flowers have higher water content and will take more time.
Remove the papers and see your finished results. Once dry, your wedding flowers are ready for framing or placing in a scrapbook.
This video clip will show you the basics of using a flower press.
I found these tips about preserving and reusing flowers from your wedding bouquet very informative, and the steps were laid out well.
Growing up, my girls enjoyed pressing flowers and using them in school projects. It’s a simple activity that people of all ages can enjoy.
I hope you found it useful as well. And remember, these preservation methods can be used to create keepsakes from prom flowers, funeral flowers, or any occasion where flowers evoke a lasting memory.
Other DIY Preservation Methods
There are other ways to preserve the flowers from your bouquets or other arrangements, like hanging them upside down and allowing them to dry naturally. While drying flowers is simple and does work, not all flowers dry well, so your results will vary.
Using hairspray, lacquer, or paraffin wax to coat the blooms and allow them to dry is another temporary solution that may hold them for six months.
I would avoid using these methods if you’re looking for a longer-term wedding flower preservation solution.
Do You Want More Tips Like This?
Want to be updated whenever I add a new video? Enter your email address below. Any email you receive will not be promotional. They’ll merely be notifications of new videos I post.
Whether subscribing interests you or not, you can still grab some extra karma points by following me on social media.
Finally, I was hoping you could do me a favor and share this post via one of the social share buttons below. I’d appreciate it.
Til next time,


